
Folding Bracket Wall Reinforcement
How to reinforce a wall for folding shelf brackets.
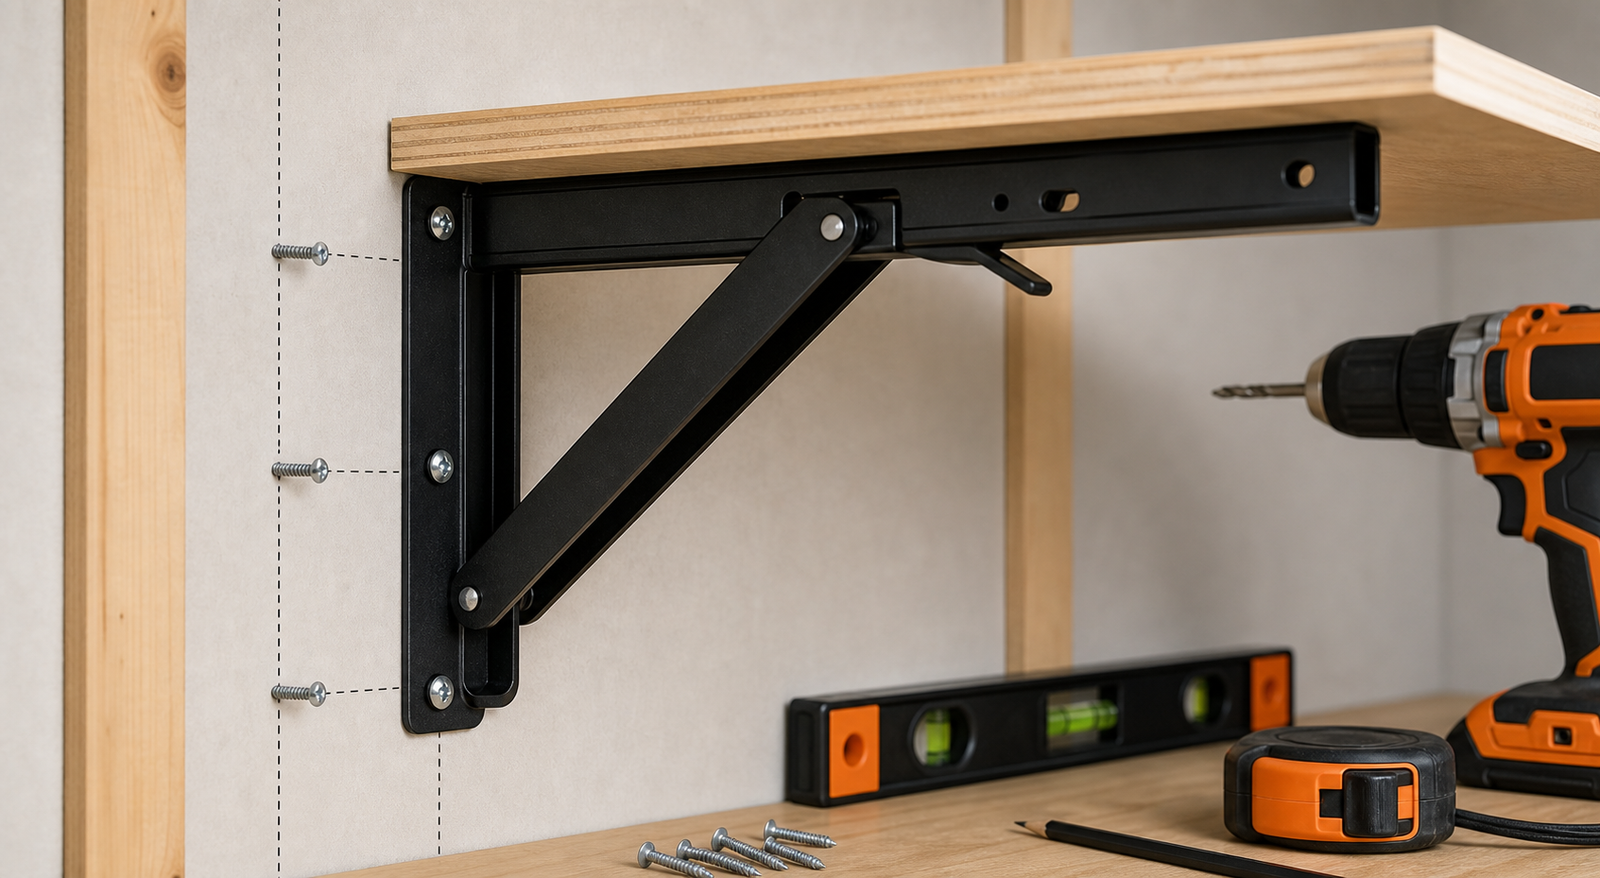
Reinforce the wall by creating a continuous, documented load path from each bracket plate into wood studs, installed blocking, structurally attached plywood backing, reinforced steel framing, concrete, or suitable masonry anchors. Drywall and thin finish panels should not be treated as universal structural support for a fold-down work surface.
- Published by
- COREAX
- Technical review
- COREAX Product Support
- Published
- Updated
Direct answer
Attach the brackets to structure, or add structure where the brackets need to be.
When bracket locations align with sound wood studs, direct stud fastening can provide the simplest path. When spacing or surface layout does not align, open the wall and install blocking, install structurally connected plywood backing, or use a designed mounting rail or connector system. For masonry, select anchors for the exact concrete, brick, or block. For steel framing, provide tested backing or engineered reinforcement rather than relying on ordinary screws through drywall into a thin stud flange.
The former “studs vs drywall” topic is consolidated here because drywall choice is part of the broader reinforcement workflow. The correct question is not merely “can an anchor hold it?” but “how does the shelf load reach the building or vehicle structure?”
Step 1
Identify the wall assembly before choosing fasteners.
| Wall type | What may be behind the finish | What must be verified |
|---|---|---|
| Wood-framed drywall | Wood studs, insulation, wiring, plumbing, fire blocking | Stud location/width, condition, utilities, desired bracket spacing, fastener embedment |
| Steel-framed drywall | Cold-formed steel studs, wires, services, insulation | Stud gauge, flange orientation, backing, connector/fastener design, load path |
| Concrete | Reinforcement, embedded utilities, post-tensioning in some structures | Concrete strength/condition, edge distance, anchor type, hole location, scanning requirements |
| Brick or block | Solid units, hollow cells, mortar joints, reinforcement | Unit type/condition, solid vs hollow zone, anchor approval, edge and spacing limits |
| RV, trailer, or van wall | Thin plywood/composite skin, wood/aluminum frame, wiring, insulation, exterior skin | Manufacturer-approved attachment zones, backing, utilities, vehicle movement, travel restraint |
| Cabinet side or partition | Plywood, particleboard, composite panel, internal cleats | Panel thickness, connection to cabinet carcass, edge distance, load path to floor/wall |
Step 2
Define the loads the wall connection must transfer.
The wall fasteners resist more than downward weight. A deep shelf creates rotational force at the wall plate. Front-edge work, leaning, impacts, and repeated folding add different demands. Bracket spacing concentrates the load into discrete locations. Use the complete shelf and intended service condition—not only stored-item weight.
Wood studs
Direct stud mounting works only when the layout and connection fit.
Confirm the stud center and both edges rather than relying on one electronic indication. Use small verification methods appropriate to the wall and avoid utilities. The bracket plate should sit flat. Select fasteners whose diameter, head, pilot hole, embedment, and corrosion resistance suit the bracket holes, wood species, expected load, and environment.
- Locate stud center and verify both sides.
- Confirm the bracket hole pattern can remain within the stud width and required edge distances.
- Use a straight vertical datum so upper and lower holes align with the same stud.
- Predrill according to the selected fastener and wood condition.
- Avoid overtightening that crushes the wall finish or deforms the bracket plate.
- Confirm the stud is part of adequate framing and has not been damaged or excessively notched.
- Use blocking when bracket locations do not align with studs.
Wood blocking
Blocking creates support only when it is connected to the framing.
Install solid wood blocking between studs at the required bracket height. The blocking should be sized and attached to transfer the bracket forces into the studs. Its face should align with the stud plane so the drywall or finish remains supported and the bracket plate sits flat after closing the wall.
Loose boards placed behind drywall, adhesive-only patches, or small scraps that cannot be mechanically connected to the framing do not create a dependable structural path. Document blocking height and extent before the wall is closed so future brackets and fasteners can be located accurately.
Plywood backing
Use structurally attached backing to gain bracket-location flexibility.
Plywood backing can span multiple studs and allow bracket positions that do not land directly on a stud center. The plywood must be thick enough for the selected fastener engagement and connected to framing with a documented fastening pattern. A decorative plywood panel screwed only to drywall remains a finish layer.
Steel framing
Thin steel stud flanges often need purpose-designed backing.
A standard drywall screw into a thin cold-formed steel flange does not establish a workbench connection. Options include preinstalled wood backing connected with a tested connector, steel plate or channel reinforcement, engineered blocking, or another system selected for the stud gauge, spacing, wall design, and load.
Simpson Strong-Tie’s WBAC is one tested connector example for attaching wood backing to cold-formed steel walls. The existence of a tested connector illustrates the principle: the backing connection matters. It does not mean that one connector fits every folding shelf, wall, or load.
Concrete, brick, and block
Select the anchor for the exact base material and location.
Drywall anchors
Do not generalize a package rating to a fold-down work surface.
Anchor packages can publish capacities for specific drywall thicknesses, load directions, spacing, and installation. A folding shelf applies repeated and leveraged forces through a bracket plate, and the wall finish can crush or crack. High-load workbenches, long shelves, RV tables, and surfaces exposed to impact should not default to drywall-only anchors.
A lightweight decorative shelf may use a suitable anchor system when the complete application is within documented conditions, but that is a different task from a folding work surface. If the consequence of pullout is injury or property damage, provide structural backing or qualified design.
Hidden utilities
Locate wires, pipes, ducts, and vehicle systems before drilling.
- Check both sides of the wall when possible.
- Review plans, photos, detector readings, and known outlet/plumbing paths.
- Use stop collars or controlled drilling depth where appropriate.
- Do not drill above/below electrical boxes or plumbing fixtures by assumption.
- In vehicles, identify wiring, fuel, brake, airbag, sensor, exterior-skin, and structural zones.
- For concrete, consider scanning for reinforcement, conduit, or post-tensioning.
- Stop when wall construction remains uncertain.
Installation sequence
Build the load path before installing the shelf.
- 01Map wall and utilities
Identify framing, masonry, cabinet structure, or vehicle attachment zones and hidden services.
- 02Choose bracket locations and spacing
Coordinate shelf spans, load zones, release access, and structural connection points.
- 03Add backing or reinforcement
Install studs/blocking/plywood/steel/masonry connection appropriate to the design.
- 04Close and mark the wall
Record backing dimensions and use a level datum for bracket-hole layout.
- 05Install brackets loosely
Use selected fasteners, keep plates flat, and preserve adjustment for alignment.
- 06Align, tighten, and attach shelf
Set all bracket tops in one plane and avoid forcing a warped shelf into alignment.
- 07Cycle and load gradually
Inspect wall movement, fastener slip, mechanism engagement, and shelf deflection.
Failure modes
What wall movement tells you.
Evidence and connection boundary
Backing must be connected to the structure it depends on.
Technical sourcesSimpson Strong-Tie publishes fastener loads and installation conditions by exact product and substrate. Its WBAC backing connector is a tested example for transferring loads from wood backing into cold-formed steel studs. These sources support designing the complete backing connection instead of treating hidden wood as automatically structural.
- Simpson Strong-Tie Fastening Systems Technical GuideOfficial fastener load, material, spacing, corrosion, and installation information.
- Simpson Strong-Tie WBAC Backing ConnectorOfficial tested connection example for wood backing in cold-formed steel wall framing.
Evidence boundary: These sources do not provide a universal reinforcement design for an unknown wall. Structural, masonry, steel-frame, public-use, vehicle/RV, or high-consequence installations may require a qualified contractor or engineer. COREAX brackets do not certify the wall or fastening system.
COREAX fit support
Send wall construction and backing photos.
Provide shelf length/depth/material, bracket size/count, complete load and load position, wall type, stud or backing layout, proposed fasteners, indoor/outdoor or vehicle use, and photos before and after the wall is opened where possible. COREAX can help with bracket fit but cannot approve an unknown structural connection.
Common questions
Wall reinforcement FAQ
Do folding shelf brackets need to mount into studs?
They need an adequate structural load path. Direct wood-stud mounting is one option; installed blocking, structurally attached plywood backing, reinforced steel framing, or suitable masonry anchors can also work when designed for the load.
Can I use drywall anchors for a folding workbench?
Do not default to drywall-only anchors for a workbench or high-load surface. Provide structural backing or use an anchor system specifically documented for the exact wall, load direction, spacing, and consequence.
Is plywood over drywall enough backing?
Only when the plywood is adequately thick and structurally attached to studs, masonry, steel framing, or another support. Plywood attached only to drywall remains dependent on the drywall connection.
How do I mount folding brackets to an RV wall?
Identify manufacturer-approved structural framing or added backing, avoid hidden utilities and exterior-skin damage, use suitable fasteners and sealing, and add a separate travel restraint. Thin wall paneling alone is usually not sufficient.
Absorbed the studs-vs-drywall topic and rebuilt the canonical page around wall identification, load inputs, wood studs, blocking, plywood, steel framing, masonry, anchor limits, utilities, installation sequence, failure diagnosis, sources, and FAQ.
Move to the next decision.
Use the next guide in the same planning path, then verify the exact product before ordering.