
Compact Cabinet Pull-Out Planning Guide
Compact cabinet pull-out hardware guide.
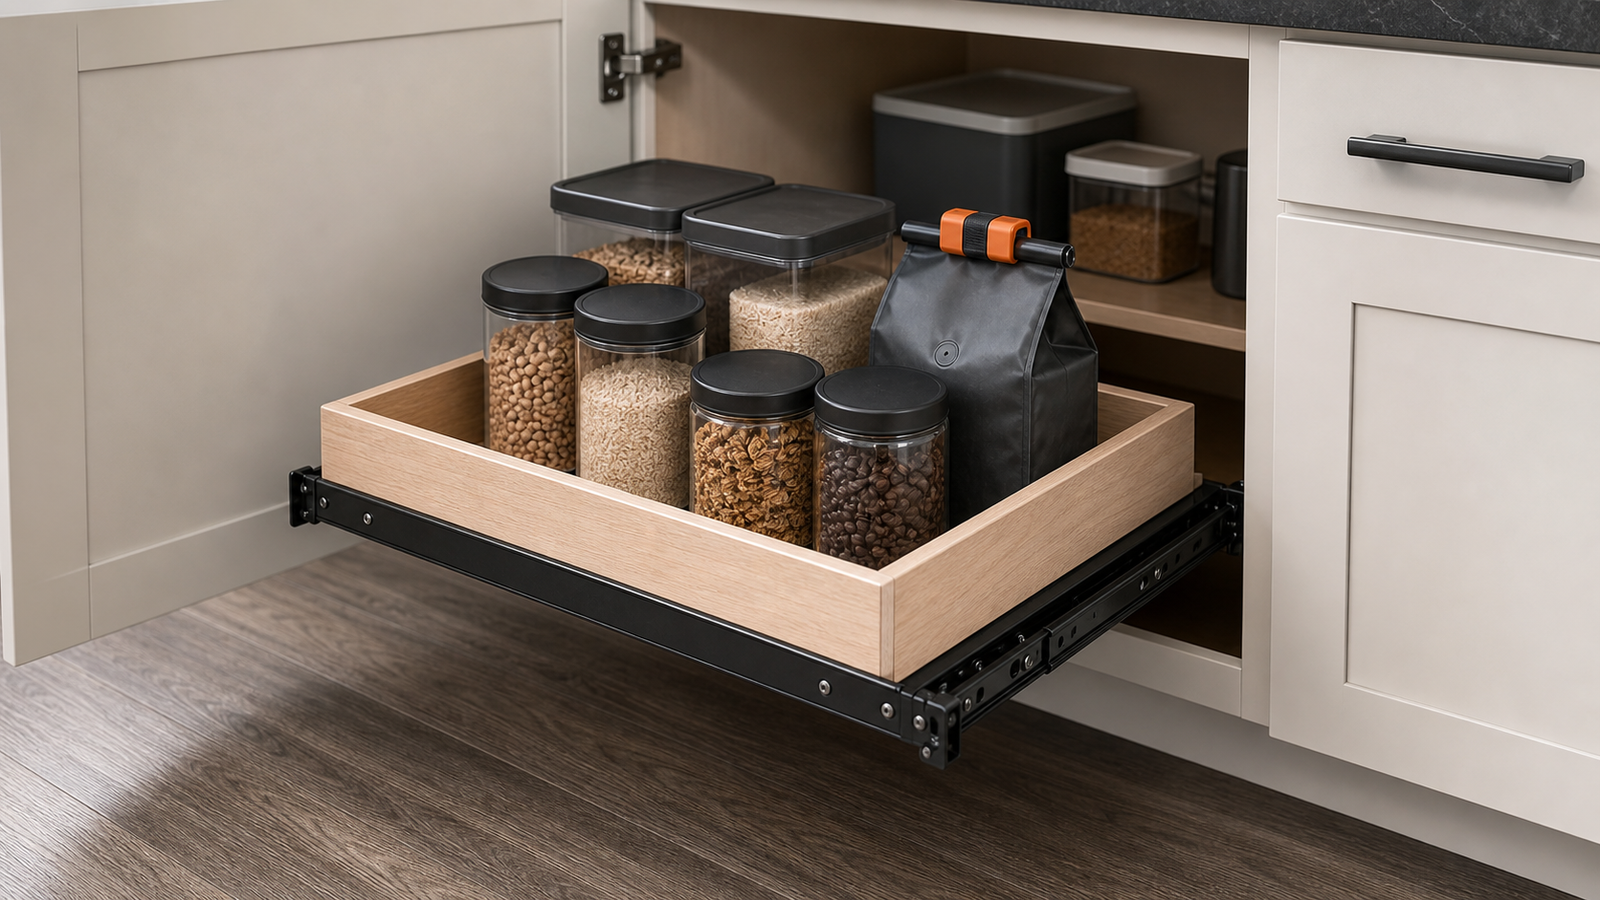
Choose compact cabinet pull-out hardware from the clear door opening, usable depth, hinge and plumbing intrusion, shelf or drawer construction, complete moving load, bottom support, runner travel, soft-close expectations, service access, and the items’ real operating envelope. The cabinet exterior dimensions are not the usable pull-out dimensions.
- Published by
- COREAX
- Technical review
- COREAX Product Support
- Published
- Updated
Direct answer
Design the pull-out around the narrowest opening and the shelf load path.
Open the cabinet doors fully and measure between the hinge bodies, face frame, door edge, latch, and trim. Measure usable depth on both sides after plumbing, wiring, shelf pins, rear braces, and service space. Choose a bottom-supported or concealed runner system that matches the shelf or drawer construction and complete moving load. Provide enough vertical clearance for the items and enough tool access to install or remove the hardware.
COREAX black bottom-mount slides are one path for bottom-supported shelves and trays in 10–20 inch sizes with soft-close action and an up-to-88-lb family specification. They are non-detachable and should not be described as a universal replacement for every concealed undermount runner or side-mount drawer slide.
Cabinet types
Face-frame, frameless, and utility cabinets create different clear openings.
| Cabinet type | Common obstruction | Planning response |
|---|---|---|
| Face-frame cabinet | Opening narrower than interior; center stile may split the bay | Size pull-out to clear frame/stile or remove/rebuild only with appropriate cabinet design |
| Frameless cabinet | Concealed hinges and door overlay intrude into opening | Measure between hinge envelopes at full door opening |
| Under-sink cabinet | Drain, supply valves, disposer, filters, hoses | Use shaped/narrow trays, preserve shutoff and service access, plan spill containment |
| Pantry base cabinet | Door hinges, shelf pins, containers taller than opening | Set vertical spacing from real container dimensions and pull-out lip |
| Vanity cabinet | Plumbing, moisture, narrow doors, tall bottles | Use removable bins and protect utilities; keep cleaners separated and accessible |
| RV/lightweight cabinet | Thin panels, vibration, utilities, travel motion | Identify backing/base structure and add positive travel latch |
| Garage/utility cabinet | Dense tools, liquid containers, dust | Calculate complete load, choose cleanable tray, and verify cabinet-base strength |
Clear-opening worksheet
Measure the path the loaded pull-out must pass through.
| Dimension | Measurement method | Use |
|---|---|---|
| Clear width at hinge height | Door fully open; measure between hinge/door/face-frame intrusions | Maximum tray, face, and cargo width |
| Clear width at tray height | Front, middle, rear if cabinet tapers or panels bow | Runner spacing and shelf width |
| Usable depth | Left and right from front datum to nearest obstruction | Maximum closed runner length |
| Usable vertical opening | Door opening, fixed shelf, plumbing, countertop underside | Container/appliance height plus tray lip and runner envelope |
| Door swing | Observe handle and door edge through full opening | Prevents tray face or cargo contact |
| Rear service space | Reserve around valves, outlets, connections, ventilation | Prevents blocking maintenance or overheating equipment |
| Tool access | Check driver/drill path before tray is installed | Determines assembly order for non-detachable rails |
Pull-out formats
Choose a shelf, tray, drawer, or basket according to containment and access.
Runner selection
Bottom-supported and concealed undermount systems are different.
A true bottom-supported slide carries an open shelf or tray through its underside. A concealed undermount runner usually carries a conventional drawer box prepared with specific notches, locking devices, rear details, and cabinet dimensions. A side-mount slide requires vertical side faces and known side clearance.
Use True Bottom-Mount vs Undermount Drawer Slides for terminology and Heavy-Duty vs Undermount for application comparison.
Complete moving load
Cabinet contents can be denser than they look.
Canned goods, glass jars, detergents, water, cookware, printers, mixers, and cleaning products create significant moving loads. Keep dense items near supports, use a stiff shelf, and verify cabinet-base and fastener strength. A runner rating does not strengthen a sagging particleboard base or a thin RV panel.
Shelf structure
The tray must resist sag and racking.
An open shelf can twist when pulled from one corner. The bottom can sag between rails under a mixer, detergent bottle, or waste bin. Use a panel, edge frame, apron, or substructure suitable for the load and rail spacing. Keep fasteners away from thin edges and prevent screw tips from entering the storage surface.
- Use a solid, flat base suitable for bottom support.
- Support concentrated appliance feet or bin wheels.
- Add a front or side lip for containment without blocking door clearance.
- Keep the tray square during assembly.
- Pull from a centered handle where practical to reduce racking.
- Test loaded movement at full extension.
- Use the open-shelf viability guide for no-side-panel builds.
Hinges and doors
A door can open fully and still block the pull-out.
Concealed hinge arms project into the cabinet and can contact the tray side or contents. Door handles can hit adjacent walls and stop the door before its nominal opening angle. Face frames and center stiles reduce clear width. Measure the actual path at the exact tray height.
Appliance pull-outs
Measure operating height, cord movement, heat, and ventilation.
A coffee maker, mixer, printer, air fryer, or other appliance can fit while stored and conflict with the countertop or door when used. Follow the appliance manufacturer for ventilation, heat, combustible clearance, cord, and operating position. A pull-out shelf should not encourage operating an appliance in an enclosed or unsupported condition.
- Closed and operating appliance dimensions.
- Door, lid, bowl, paper tray, or accessory movement.
- Power outlet and controlled cord loop.
- Heat and ventilation requirements.
- Concentrated foot or base loads.
- Surface cleaning and spill protection.
- Service/removal path.
Installation sequence
Plan assembly around a non-detachable runner.
- 01Empty and map the cabinet
Mark clear opening, hinges, utilities, rear service, and base structure.
- 02Build the shelf/tray
Keep it square, flat, stiff, and within measured width/height.
- 03Mark runner lines
Use a shared datum and verify left/right spacing and parallelism.
- 04Predrill and install loosely
Use appropriate fasteners and preserve alignment adjustment.
- 05Cycle before final tightening
Check door clearance, soft-close engagement, full travel, screw interference, and tool access.
- 06Add load gradually
Observe shelf sag, cabinet-base movement, hinge contact, and closing behavior.
- 07Document service removal
Record which fasteners and cabinet parts must be accessed if the non-detachable assembly needs replacement.
Failure modes
What compact pull-out symptoms reveal.
Evidence and system boundary
Concealed runners require exact drawer and kit instructions.
Manufacturer sourcesBlum publishes runner assembly sheets by exact product kit, with system-specific drawer preparation and locking components. Accuride’s platform slide example publishes top/bottom brackets, platform width, load, and travel as explicit conditions. These sources support selecting a documented bottom-supported or concealed system rather than rotating or adapting hardware by category name.
- Blum Runner Assembly InstructionsOfficial exact-kit instructions for concealed undermount drawer systems.
- Accuride 301-2590 Platform SlideOfficial bottom/top platform example with defined brackets, width, load, travel, and non-disconnect design.
Evidence boundary: These external systems do not certify COREAX products or a custom cabinet. COREAX black bottom-mount specifications come from current product data. Verify the selected size, cabinet, shelf, fasteners, load, and service access.
COREAX product path
Send the clear opening and tray construction.
For suitable compact bottom-supported shelves, review COREAX black bottom-mount slides. Provide the clear opening at hinge/tray height, usable depth, desired size, shelf material/thickness, complete moving load, cabinet-base structure, appliance or container dimensions, and photos of hinges and utilities.
Common questions
Compact cabinet pull-out FAQ
Should I measure cabinet inside width or door opening width?
Measure both, but the loaded pull-out must pass through the narrowest clear door opening after hinges, face frames, door edges, latches, and trim are included.
Can bottom-mount slides support a shelf without side panels?
They can when the exact system is designed for bottom support and the shelf is sufficiently stiff, square, aligned, and within the load and width conditions.
Are COREAX black bottom-mount slides detachable?
No. The current family is non-detachable, so plan installation, tool access, and future service around the complete rail assembly.
Can I use a pull-out shelf for a countertop appliance?
Only when the selected slide, shelf, cabinet, electrical cord, ventilation, heat, operating clearance, and appliance instructions all support the use.
Expanded with cabinet-type checks, a clear-opening worksheet, pull-out formats, runner terminology, load and shelf structure, hinge and appliance clearances, installation limits, failure modes, and common questions.
Move to the next decision.
Use the next guide in the same planning path, then verify the exact product before ordering.