
Folding Bracket Alignment And Level
How to install folding shelf brackets level.
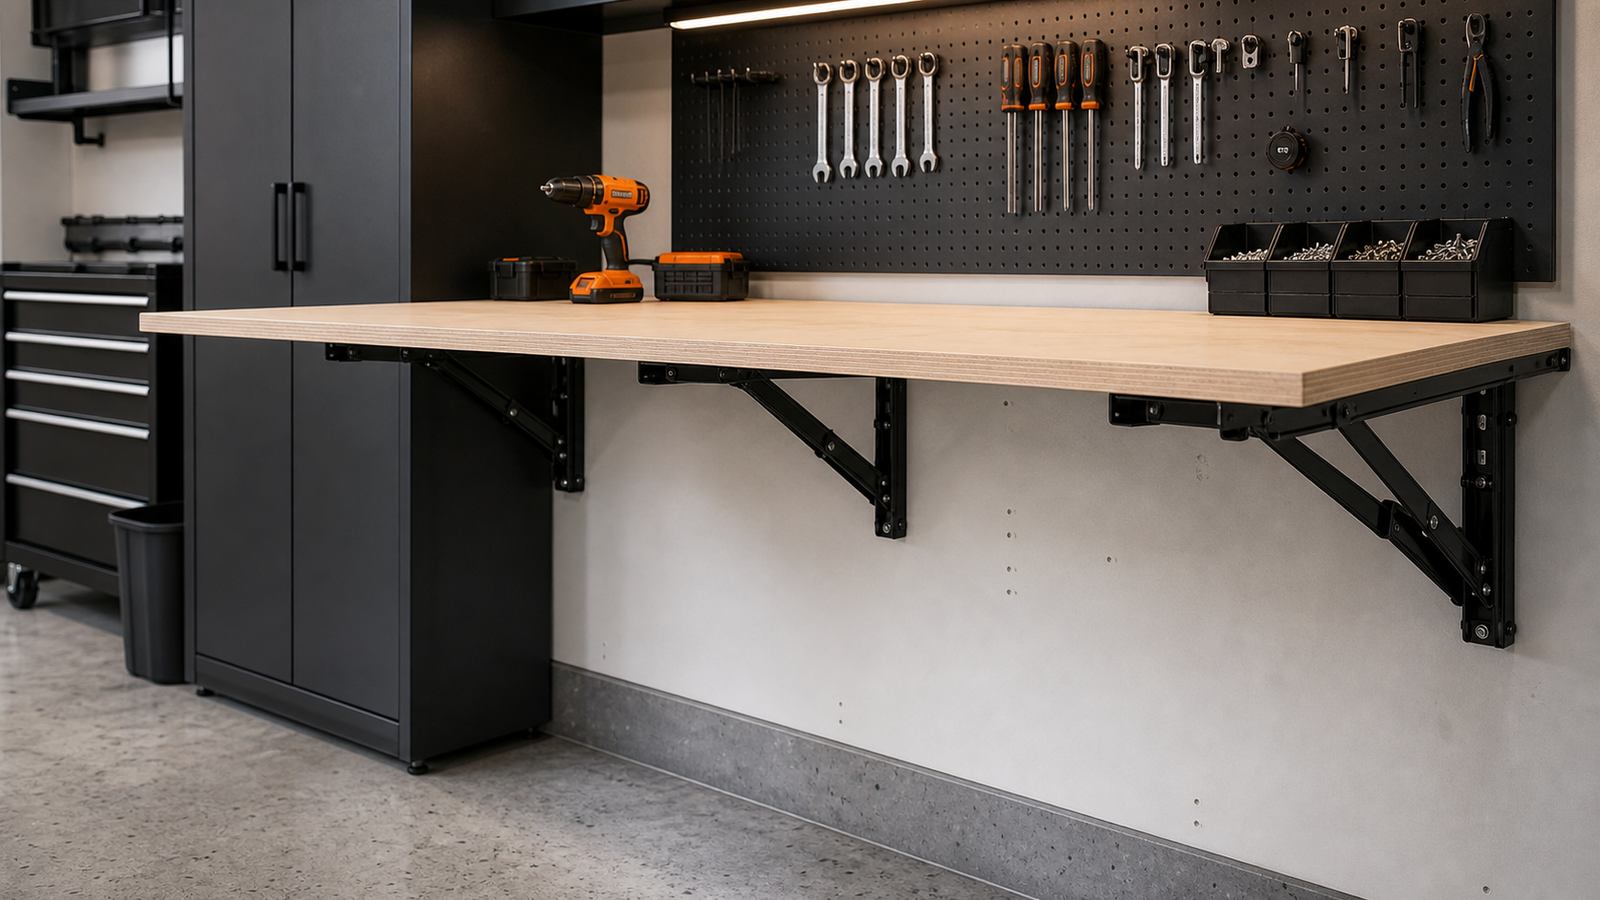
Install folding brackets from one continuous level datum, verify the wall plane, set every bracket at the same height and setback, keep fasteners adjustable until the shelf cycles correctly, and correct shelf warp or wall unevenness before final tightening. A bracket that does not sit exactly at 90 degrees is often revealing an alignment, wall, shelf, or mechanism difference rather than one isolated defective part.
- Published by
- COREAX
- Technical review
- COREAX Product Support
- Published
- Updated
Direct answer
Align the bracket arms to one plane, not each bracket to a different wall patch.
Locate adequate backing and draw one level reference line across all bracket positions. Check whether the wall bows or twists. Mark the same wall-plate height and setback for every bracket. Install fasteners loosely enough for correction, extend and lock all brackets, place a straightedge across their arms, shim or correct the mounting plane where appropriate, attach the shelf without forcing it, cycle the system, and tighten in stages.
If one bracket stops below or above the others, determine whether the cause is wall flatness, hole layout, screw tension, shelf warp, bracket mechanism, debris, or deformation. Do not force the shelf to make the brackets agree.
Tools and references
Use tools long enough to represent the complete surface.
Wall plane
A level line on a wavy wall does not create coplanar bracket plates.
Drywall seams, bowed studs, tile, masonry texture, trim, paint buildup, and uneven cabinet panels can make one bracket sit farther forward or rock. If the wall plates are not coplanar, the open arms can point in different directions even when their top holes are on a level line.
- Hold a long straightedge across all mounting zones.
- Identify high spots, low spots, trim, joints, and surface damage.
- Do not bridge a baseboard, tile edge, or raised seam with only part of the plate.
- Correct the backing or mounting surface where possible.
- Use full-support shims only when appropriate to the fastener and load path.
- Do not use compressible cardboard or loose packing in a structural connection.
- Recheck wall-plate clamping after final tightening.
Hole layout
Transfer one bracket geometry to every location.
- 01Choose finished shelf height
Account for shelf thickness and whether the bracket arm sits directly below the board.
- 02Draw or project one level reference
Use the same line across all bracket positions.
- 03Mark bracket centerlines
Coordinate backing, shelf spacing, end overhang, load zones, and release access.
- 04Use the actual bracket or a rigid template
Do not assume every hole is symmetrically placed or every bracket can be flipped without changing operation.
- 05Mark upper and lower holes from one datum
Confirm the plate remains plumb and on adequate backing.
- 06Verify before drilling
Check shelf dimensions, folded path, utilities, and all bracket locations together.
Loose installation
Preserve adjustment until the open plane is proven.
Install each bracket with selected fasteners but do not fully clamp the plates until all brackets can be compared. Extend and lock them. Place a straightedge across the arms at the wall side and front side. Adjust height, plate rotation, and setback without forcing the mechanism.
Why brackets may not sit at 90 degrees
Open angle is a system observation, not a guarantee from the word “folding.”
The former “brackets not 90 degrees” page is consolidated here. A small visible angle difference can come from the bracket’s designed stop, manufacturing tolerance, mechanism preload, wall plate tilt, shelf board warp, fastener tension, load deflection, or one bracket not fully locked. Determine whether the surface is within the product specification and usable for the application rather than forcing the arm to a geometric 90 degrees.
| Observation | Likely cause | Action |
|---|---|---|
| Both brackets have the same slight angle | Product stop geometry or shared mounting-plane angle | Check product instructions and shelf level; do not modify the mechanism without authorization |
| Only one bracket differs | Mounting height/plane, incomplete lock, debris, damage, or part variation | Remove shelf load, inspect mechanism and plate alignment, compare brackets individually |
| Angle changes after tightening | Fasteners pull plate into uneven wall or deform connection | Correct mounting surface/shim and use balanced tightening |
| Angle changes under load | Shelf, bracket, fastener, backing, or wall deflection | Stop and review complete capacity/load path |
| Shelf is level but arms look different | Shelf warp or shimming creates uneven bracket contact | Check straightedge across arms and shelf underside |
| Bracket will not reach lock | Interference, debris, mechanism damage, misalignment, or load | Do not force; unload and inspect before use |
Shelf board
A warped shelf can undo careful bracket alignment.
Check the board with a straightedge before attachment. A cupped or twisted board can pull one bracket up and another down. Moisture and finish applied unevenly can change board shape. A long board can sag between supports and make the front edge look unlevel even when the brackets are aligned.
- Acclimate wood products to the installation environment where appropriate.
- Check top, bottom, front, and rear edges for bow and twist.
- Finish surfaces consistently according to the material system.
- Do not use shelf screws to force a severe warp flat.
- Add support or a stiffening frame when span deflection controls the surface.
- Keep shelf fasteners clear of the folding mechanism and release tabs.
Shelf attachment
Clamp the board without shifting the brackets.
- 01Place the shelf on locked brackets
Confirm overhang, wall gap, front alignment, and release access.
- 02Clamp lightly
Prevent movement without bending the board or changing bracket position.
- 03Mark and predrill shelf holes
Use fasteners suitable for board material and thickness; prevent screw tips from exiting the surface.
- 04Install fasteners incrementally
Alternate brackets and recheck the straightedge so one side does not pull the shelf out of plane.
- 05Cycle the complete surface
Release each bracket in the safe sequence and verify no shelf edge or fastener enters the mechanism path.
- 06Final-tighten wall connections
Keep plates flat and recheck the open plane after tightening.
Loaded level check
Level unloaded does not prove level in use.
Add representative load gradually and observe the front edge, wall plates, and each bracket. Check the load positions that matter: near wall, span center, front working area, and any fixed appliance. If the shelf changes angle significantly, identify whether board bending, bracket deflection, wall movement, or uneven support is controlling the result.
RV and mobile installations
Level while parked does not make the surface travel-secure.
An RV or trailer can be parked out of level, so decide whether the table needs adjustment independent of the vehicle. The wall may be lightweight and flexible. The folded surface needs a separate positive travel latch. Check seats, doors, beds, windows, appliances, and egress in both open and folded positions.
Do not use the bracket mechanism as the only travel restraint. Do not use the shelf as seating or a sleeping platform unless purpose-designed for human support.
Acceptance checklist
Release the surface for use only after these checks pass.
- Wall backing and fasteners are appropriate and documented.
- All wall plates sit flat without rocking.
- All open arms share one plane before shelf attachment.
- The shelf is acceptably straight and not forced into position.
- Every bracket locks completely and releases deliberately.
- Fasteners do not enter the mechanism or protrude through the shelf.
- Front edge remains within acceptable level/deflection under representative load.
- No wall gap, cracking, fastener movement, or unequal support appears after testing.
- Folded position clears surroundings and is travel-latched where applicable.
- User instructions prohibit unsupported human loads and unsafe release methods.
Evidence and installation boundary
Fastener placement and backing remain part of alignment.
Technical sourcesSimpson Strong-Tie’s installer instructions warn that incorrect fastener quantity, size, placement, type, material, or finish can cause a connection to fail. Its fastening guide publishes spacing and installation conditions by exact fastener. These sources support laying out and tightening brackets as a connection system rather than correcting level through arbitrary screws or shims.
- Simpson Strong-Tie General Installer InstructionsOfficial warning about correct fastener quantity, size, placement, type, material, and finish.
- Simpson Strong-Tie Fastening Systems Technical GuideOfficial fastener load, spacing, material, corrosion, and installation information.
Evidence boundary: These sources do not establish level tolerance or capacity for an unknown COREAX installation. Follow the selected bracket and fastener instructions. Structural, masonry, steel-frame, vehicle, public-use, or human-support surfaces may require qualified design.
COREAX fit support
Send straight-on photos and measurements from every bracket.
Provide shelf length/depth/material, bracket size/count, wall construction/backing, fasteners, reference-line method, wall-plane observations, unloaded and loaded front-edge measurements, and photos of each plate, open arm, mechanism, and the straightedge across all supports.
Common questions
Level installation FAQ
Why are my folding brackets not exactly 90 degrees?
The designed stop, mounting-plane angle, wall unevenness, plate alignment, fastener tension, incomplete lock, shelf warp, load deflection, debris, or damage can change the observed angle. Compare the exact product and complete system before forcing it.
Should I level each bracket separately?
Use one continuous level datum and a straightedge across all open arms. Separately leveling each bracket against different wall patches can leave the supports out of plane.
Can I shim behind a folding bracket?
Only with a suitable full-support material and connection design that keeps the wall plate stable and the fasteners properly loaded. Do not use compressible or loose packing.
Why is the shelf level empty but sags when loaded?
The shelf board, bracket arms, fasteners, backing, or wall may be deflecting, or the brackets may not share load equally. Stop and diagnose the complete load path.
Absorbed the not-90-degrees topic and rebuilt the canonical page around wall-plane checks, common datum, loose alignment, angle diagnosis, shelf warp, staged attachment, loaded level checks, mobile boundary, acceptance checklist, sources, and FAQ.
Move to the next decision.
Use the next guide in the same planning path, then verify the exact product before ordering.